Hey guys 🤚, Glad to have you here.
In the previous post, we covered the Part 1 of this series about building a complete Fullstack app called FoxNews using Amazon Web Services. The Part 1 was focused on setting our tools and host the basic setup of our Next.js app on Amazon Amplify using Amplify Framework. In this part, we will be building the main logic of our app using Next.js and Tailwind CSS. The main purpose of this part will be :
- Being able to Fetch and display news from external API. We will use https://newscatcherapi.com/ to fetch randoms news.
- Display some specifics details about a news
Some usefull tools we will be using in this part
- Next.js
- Tailwind CSS to style everything
- NewscatcherAPI to fetch Random news (For now, we will add some logic to create and store news on our own remote server later 😉)
1. Put everything in place
As we are using existing project, we just need to clone the project at the stage we left in our previous post where we hosted the basic version of our Next.js App. To do so, run this command inside the terminal
git clone -b feat/part1-setup-with-amplify --single-branch https://github.com/Doha26/Foxnews-nextjs-aws.gitWith this, you fetch all the branches in the repository, checkout to the one you specified, and the specific branch becomes the configured local branch for git push and git pull The --single-branch flag (introduced in Git version 1.7.10) allows you to only fetch files from the specified branch without fetching other branches
Go tot the root of the project with cd foxnews-nextjs-aws and yarn
Create a new branch to track all the changes we will make during this Part 2. To do so, run this inside the terminal.
git checkout -b feat/part2-ui-layerto create a new branch calledfeat/part2-ui-layergit push --set-upstream origin feat/part2-ui-layerpush everything on github to start- run yarn dev to serve the default setup at
localhost:3000that looks like this
Well 👏, if you have this, it's means we are ready for the next step. Let's go 🏄🏼♂️
2. Setup Tailwind CSS
In this section, we are going to build the UI Layer of this second part with next.Js and Tailwind CSS. First of all we are going to create our folder structure and replace the default one provided by Next.js with the following steps:
- move
/pagesfolder insidesrcfolder - create a new folder named
/uiinsidesrcand inside theuifolder, create another folder namedcomponentthat will host our components
With this setup, we are good to go. Let's setup tailwind CSS to work with our Next.js setup. According to Tailwind documentation here, it's very simple to do.
- Install Tailwind CSS: To install Tailwind and its peer dependencies, Run this on your favorite terminal
yarn add -D tailwindcss postcss autoprefixerand then run the init command to generate bothtailwind.config.jsandpostcss.config.jswithnpx tailwindcss init -p - Configure your template paths: Add the paths to all of your template files in your
tailwind.config.jsfile.
module.exports = {
  content: [  // ADD this content block
    "./src/pages/**/*.{js,ts,jsx,tsx}",
    "./src/ui/components/**/*.{js,ts,jsx,tsx}",
  ],
  theme: {
    extend: {},
  },
  plugins: [],
}- Add the Tailwind directives to the global CSS file : add the following inside
./styles/globals.cssfile
@tailwind base;
@tailwind components;
@tailwind utilities;
That's all. Tailwind is now set with our Next.js setup. Let's add custom font and styles that we will use in our app. For the font, we will use Inter, a free google font. Next, create a file name _document.tsx inside /src/pages folder and add the following:
import Document, { Html, Head, Main, NextScript } from 'next/document'
import { DocumentContext } from 'next/document'
class MyDocument extends Document {
  static async getInitialProps(ctx: DocumentContext) {
    const initialProps = await Document.getInitialProps(ctx)
    return initialProps
  }

  render() {
    return (
      <Html>
        <Head>
          <link href="https://fonts.googleapis.com/css2?family=Inter&display=swap" rel="stylesheet" />
        </Head>
        <body>
          <Main />
          <NextScript />
        </body>
      </Html>
    )
  }
}

export default MyDocument
This will override the default Document object and update the html of our page to import the font we need. Now Open tailwind.config.js file and add the following:
/** @type {import('tailwindcss').Config} */
const defaultTheme = require('tailwindcss/defaultTheme')
module.exports = {
  ..
  theme: {
    extend: {
      fontFamily: { // Add this to register the theme with tailwind
        sans: ['Inter', ...defaultTheme.fontFamily.sans]
      }
    },
    colors: { // Add some colors with variant
      description: '#54595F',
      white: '#fff',
      black: '#000',
      grey: {
        100: '#cfd8dc'
      },
      blue: {
        400: '#5c6bc0'
      },
      red: {
        400: '#ef5350',
        500: '#f44336'
      }
    }
  },
  plugins: []
}
That's all, we are our Font and Tailwind set with the project
3. Create components
Inside src/ui/components create the following functional components.
- Footer.tsx
import Image from 'next/image'
import Link from 'next/link'

const Footer = () => (
  <nav className="mb-0 fixed w-full z-10 bottom-0 bg-black ">
    <div className="flex flex-row items-center justify-between h-10 sm:w-9/12 sm:mx-auto mx-4 ">
      <Image src="/logo-img.svg" alt="Logo" width="25" height="25" />
      <Link href="">
        <h1 className="font-mono font-bold text-sm hidden md:block text-white cursor-pointer">© Your Name :)</h1>
      </Link>
    </div>
  </nav>
)

export default Footer
- Header.tsx
import Head from 'next/head'

const Header = () => (
  <Head>
    <title>FoxNews</title>
    <meta name="description" content="Generated by create next app" />
    <link rel="icon" href="/favicon.ico" />
  </Head>
)

export default Header
- Nav.tsx
import Image from 'next/image'
import Link from 'next/link'

const Nav = () => (
  <nav className="mt-0 fixed w-full z-10 top-0 bg-black ">
    <div className="flex flex-row items-center justify-between h-16 sm:w-9/12 sm:mx-auto mx-4 ">
      <div className="flex flex-row">
        <Image src="/logo-img.svg" alt="Logo" width="36" height="36" />
        <Link href="/">
          <a className="font-mono font-bold text-3xl p-2 hidden sm:block cursor-pointer text-white">FoxNews</a>
        </Link>
      </div>
      <h1 className="font-mono font-bold text-sm hidden md:block text-white">
        Call Us (348)981.872 / hello@foxnews.com
      </h1>
      <h1 className="font-mono font-bold text-sm hover:underline hover:cursor-pointer hover:font-bold text-white">
        Login
      </h1>
    </div>
  </nav>
)

export default Nav
4. The main page
Inside /src/pages/index.tsx add the following code to import our created components
import Header from '../ui/components/Header'
import type { NextPage } from 'next'
import Nav from '../ui/components/Nav'
import Footer from '../ui/components/Footer'

const Home: NextPage = () => {
  return (
    <div className="flex flex-col">
      <Header />
      <Nav />
      <Footer />
    </div>
  )
}
export default Home
And we have the following result that display only the Navbar and the footer
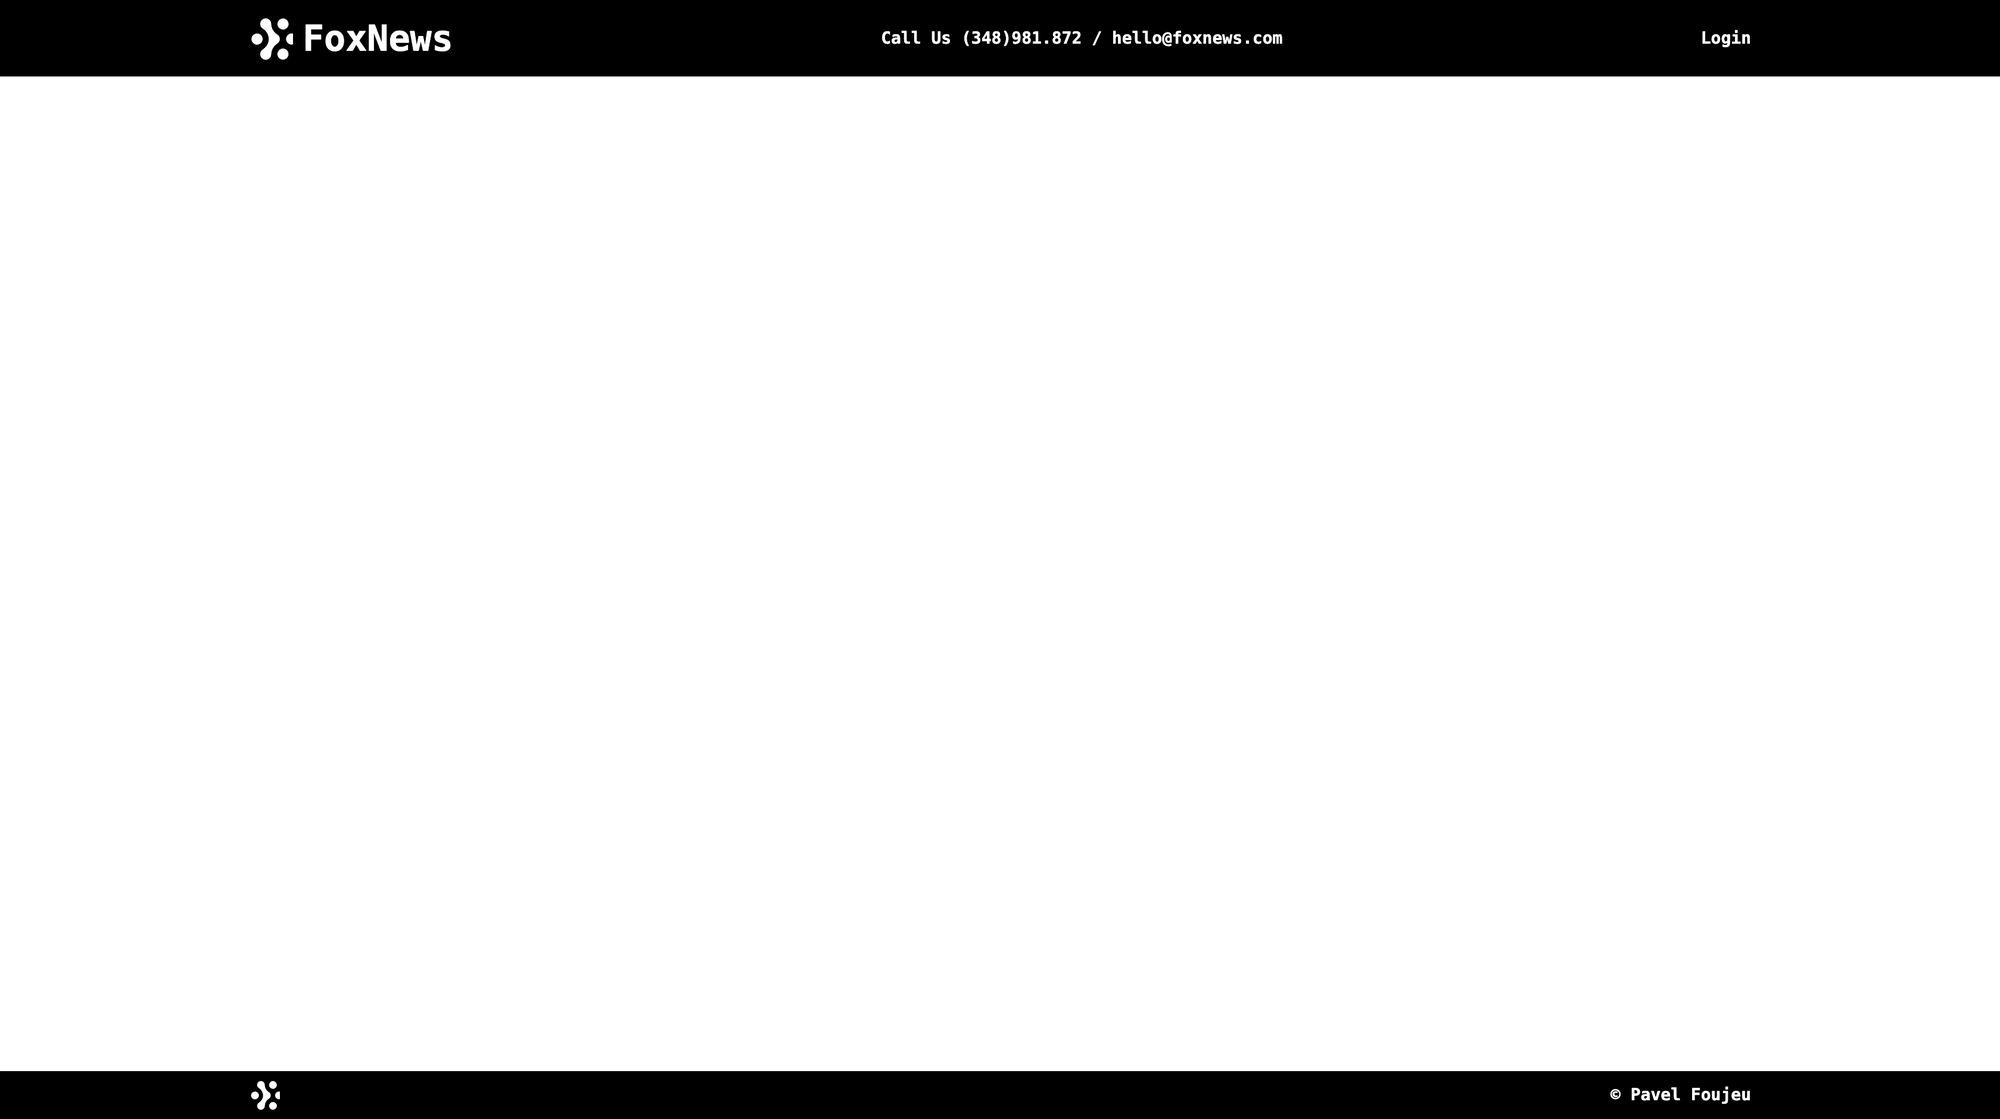
Now, let's create NewsItem component. For this we need to first create associated type. Create a file name utils.ts inside src folder. According to NewsCatcherAPI, a News type will have the following attribute.
export type NewsAPIObject = {
  media: string
  title: string
  summary?: string
  authorImg?: string
  author?: string
  authorRole?: string
  hasImage?: boolean
  largeImage?: boolean
  itemIndex?: number
  link?: string
  published_date?: string
  topic?: string
  country?: string
  language?: string
  _id?: string
  _score?: number
  twitter_account?: string
  clean_url?: string
  expand?: boolean
}

export type NewsAPIResponse = {
  status?: string
  total_pages?: number
  page_size?: number
  articles?: NewsAPIObject[]
}
Now create NewsItem.tsx inside src/ui/components. Before adding html inside our component, there is 2 things to note.
- A NewsItem will have a description that will not be full displayed. We will display 150 characters and add a
Read more >>button that will hide or display the full description. to do so, we will use create a function calledtoggleReadMore()to change the state according to if the buttonRead More >>is clicked or not and use a plugin that provides utilities for visually truncating text after a fixed number of lines. - A NewsItem also have a
published_dateand we will format it using moment.js
let's install required lib. Run the following on your terminal: yarn add moment @tailwindcss/line-clamp.
As @tailwindcss/line-clamp is a Tailwind CSS plugin, we need to register it inside tailwind.config.js
/** @type {import('tailwindcss').Config} */
module.exports = {
  theme: {
    ..
  },
  plugins: [require('@tailwindcss/line-clamp'))] // <= TAILWIND PLUGINS
}
The NewsItem.tsx file will have the following
import { useState } from 'react'
import moment from 'moment'
import { NewsAPIObject } from '../../utils'

const News = ({ media, title, summary, author, country, published_date, expand }: NewsAPIObject) => {
  const [isReadMore, setIsReadMore] = useState(false)
  const toggleReadMore = () => {
    setIsReadMore(!isReadMore)
  }

  return (
    <div
      className={`flex flex-col ${
        !expand ? 'cursor-pointer transition hover:scale-105 duration-300 ease-in-out delay-50 mt-4' : 'mt-8'
      }`}
    >
      <img className={`object-cover rounded w-full ${expand ? 'h-80' : 'h-48'}`} src={media} alt="Img" />
      <h1
        className={`line-clamp-3 py-3 font-Inter font-semibold ${
          expand ? 'text-3xl' : 'text-2xl'
        } text-black hover:text-primary text-left text-ellipsis overflow-clip `}
      >
        {title}
      </h1>
      <p className="line-clamp-4 font-medium text-base text-description  mb-5 text-left">
		 {isReadMore ? summary?.slice(0, 150) : summary}
        <span onClick={() => toggleReadMore()} className="font-semibold text-sm cursor-pointer text-blue-400">
          {isReadMore ? '...read more' : ' show less'}
        </span>
      </p>
      <div className="flex items-center">
        <img className="rounded-lg w-10 h-10 object-cover" src={media} alt="Img" />
        <div className="flex flex-col ml-2">
          <strong>
            {author} <span className="text-xs text-description">| {country}</span>
          </strong>
          <span className="text-sm text-description">{moment(published_date).format('MMMM Do YYYY, h:mm:ss a')}</span>
        </div>
      </div>
    </div>
  )
}

export default News
Create some data inside src/utils.ts with the following:
..

export const fakeNews = [
  {
    title: "Chelsea Marcantel's The Upstairs Department Finishes World Premiere Run June 12",
    author: 'Leah Putnam',
    published_date: '2022-06-12 04:30:00',
    link: 'https://playbill.com/article/chelsea-marcantels-the-upstairs-department-finishes-world-premiere-run-june-12',
    clean_url: 'playbill.com',
    summary:
      'Regional News Regional News Regional News Regional News Regional News Video Los Angeles News Regional News Regional News Regional News Awards Video Regional News Regional News Video Video Regional News Production Photos Production Photos Regional News Regional News Regional News Regional News Regional News Regional News Regional News Regional News Regional News Regional News Regional News Regional News Regional News Los Angeles News Regional News Regional News Production Photos Cast Recordings &',
    topic: 'news',
    country: 'US',
    language: null,
    media: 'https://assets.playbill.com/editorial/_1200x630_crop_center-center_82_none/1cVRwy-4.jpeg?mtime=1648834896',
    authorImg:
      'https://assets.playbill.com/editorial/_1200x630_crop_center-center_82_none/1cVRwy-4.jpeg?mtime=1648834896',
    twitter_account: '@playbill',
    _score: 5.424161,
    _id: 'c17698032111425760dac1cf58bd8778'
  },
  {
    title: "Britta Johnson's Life After Begins Previews at Chicago's Goodman Theatre June 11",
    author: 'Leah Putnam',
    published_date: '2022-06-11 04:01:28',
    link: 'https://playbill.com/article/britta-johnsons-life-after-begins-previews-at-chicagos-goodman-theatre-june-11',
    clean_url: 'playbill.com',
    summary:
      'Regional News Regional News Regional News Regional News Video Los Angeles News Regional News Regional News Regional News Awards Video Regional News Regional News Video Video Regional News Production Photos Production Photos Regional News Regional News Regional News Regional News Regional News Regional News Regional News Regional News Regional News Regional News Regional News Regional News Regional News Los Angeles News Regional News Regional News Production Photos Cast Recordings & Albums Region',
    topic: 'science',
    country: 'US',
    language: 'en',
    authorImg:
      'https://assets.playbill.com/editorial/_1200x630_crop_center-center_82_none/1cVRwy-4.jpeg?mtime=1648834896',
    media:
      'https://assets.playbill.com/editorial/_1200x630_crop_center-center_82_none/Samantha-Williams-Paul-Alexander-Nolan-and-Bryonha-Marie-Parham_HR.jpg?mtime=1654788330',
    twitter_account: '@playbill',
    _score: 5.418454,
    _id: 'f54468ea81e6026241e6af6b2bb07848'
  }
]
Update src/index.tsx to use the new component.
..
import { NewsAPIObject } from '../utils'
import Link from 'next/link'
import News from '../ui/components/NewsItem'
import { fakeNews, NewsAPIObject } from '../utils'

const articles: NewsAPIObject[] = fakeNews

const Home: NextPage = () => {
return (
    <div className="flex flex-col">
      <Header />
      <Nav />
      {articles?.length && (
        <div className=" flex justify-center font-bold mt-24 text-2xl underline text-black items-center">
          {messageTitle}
          <span className="flex h-3 w-3 ml-2">
            <div className="animate-ping inline-flex h-3 w-3 rounded-full bg-red-400 opacity-75"></div>
            <span className="absolute rounded-full h-3 w-3 bg-red-500"></span>
          </span>
        </div>
      )}

      {articles?.length && (
        <div className="sm:px-16 py-8 grid grid-cols-1 sm:grid-cols-2 md:grid-cols-3  gap-6 mx-auto w-10/12 mb-32">
          {articles?.map((item: NewsAPIObject) => {
            return (
              <Link href={`/news/${item._id}`} key={item._id}>
                <a>
                  {/* To avoid forwardRef issue with Next/link*/}{' '}
                  <News
                    media={item.media}
                    title={item.title}
                    summary={item.summary}
                    author={item.author}
                    authorImg={item.authorImg}
                    country={item.country}
                    _id={item._id}
                    published_date={item.published_date}
                    expand={false}
                  />
                </a>
              </Link>
            )
          })}
        </div>
      )}
      {error && (
        <div className="flex font-mono font-bold text-md mx-auto w-10/12 justify-center mt-36"> {messageTitle}</div>
      )}
      <Footer />
    </div>
  )
}
export default Home
At his step, let's add a title for this page. Inside the index.tsx
import { useState } from 'react'

const Home: NextPage = () => {
const [messageTitle, setMessageTitle] = useState('Latest updates')

 return (
     ..
   <Nav/>
     {articles?.length && (
        <div className=" flex justify-center font-bold mt-24 text-2xl underline text-black items-center">
          {messageTitle}
          <span className="flex h-3 w-3 ml-2">
            <div className="animate-ping inline-flex h-3 w-3 rounded-full bg-red-400 opacity-75"></div>
            <span className="absolute rounded-full h-3 w-3 bg-red-500"></span>
          </span>
        </div>
      )}
 )
}
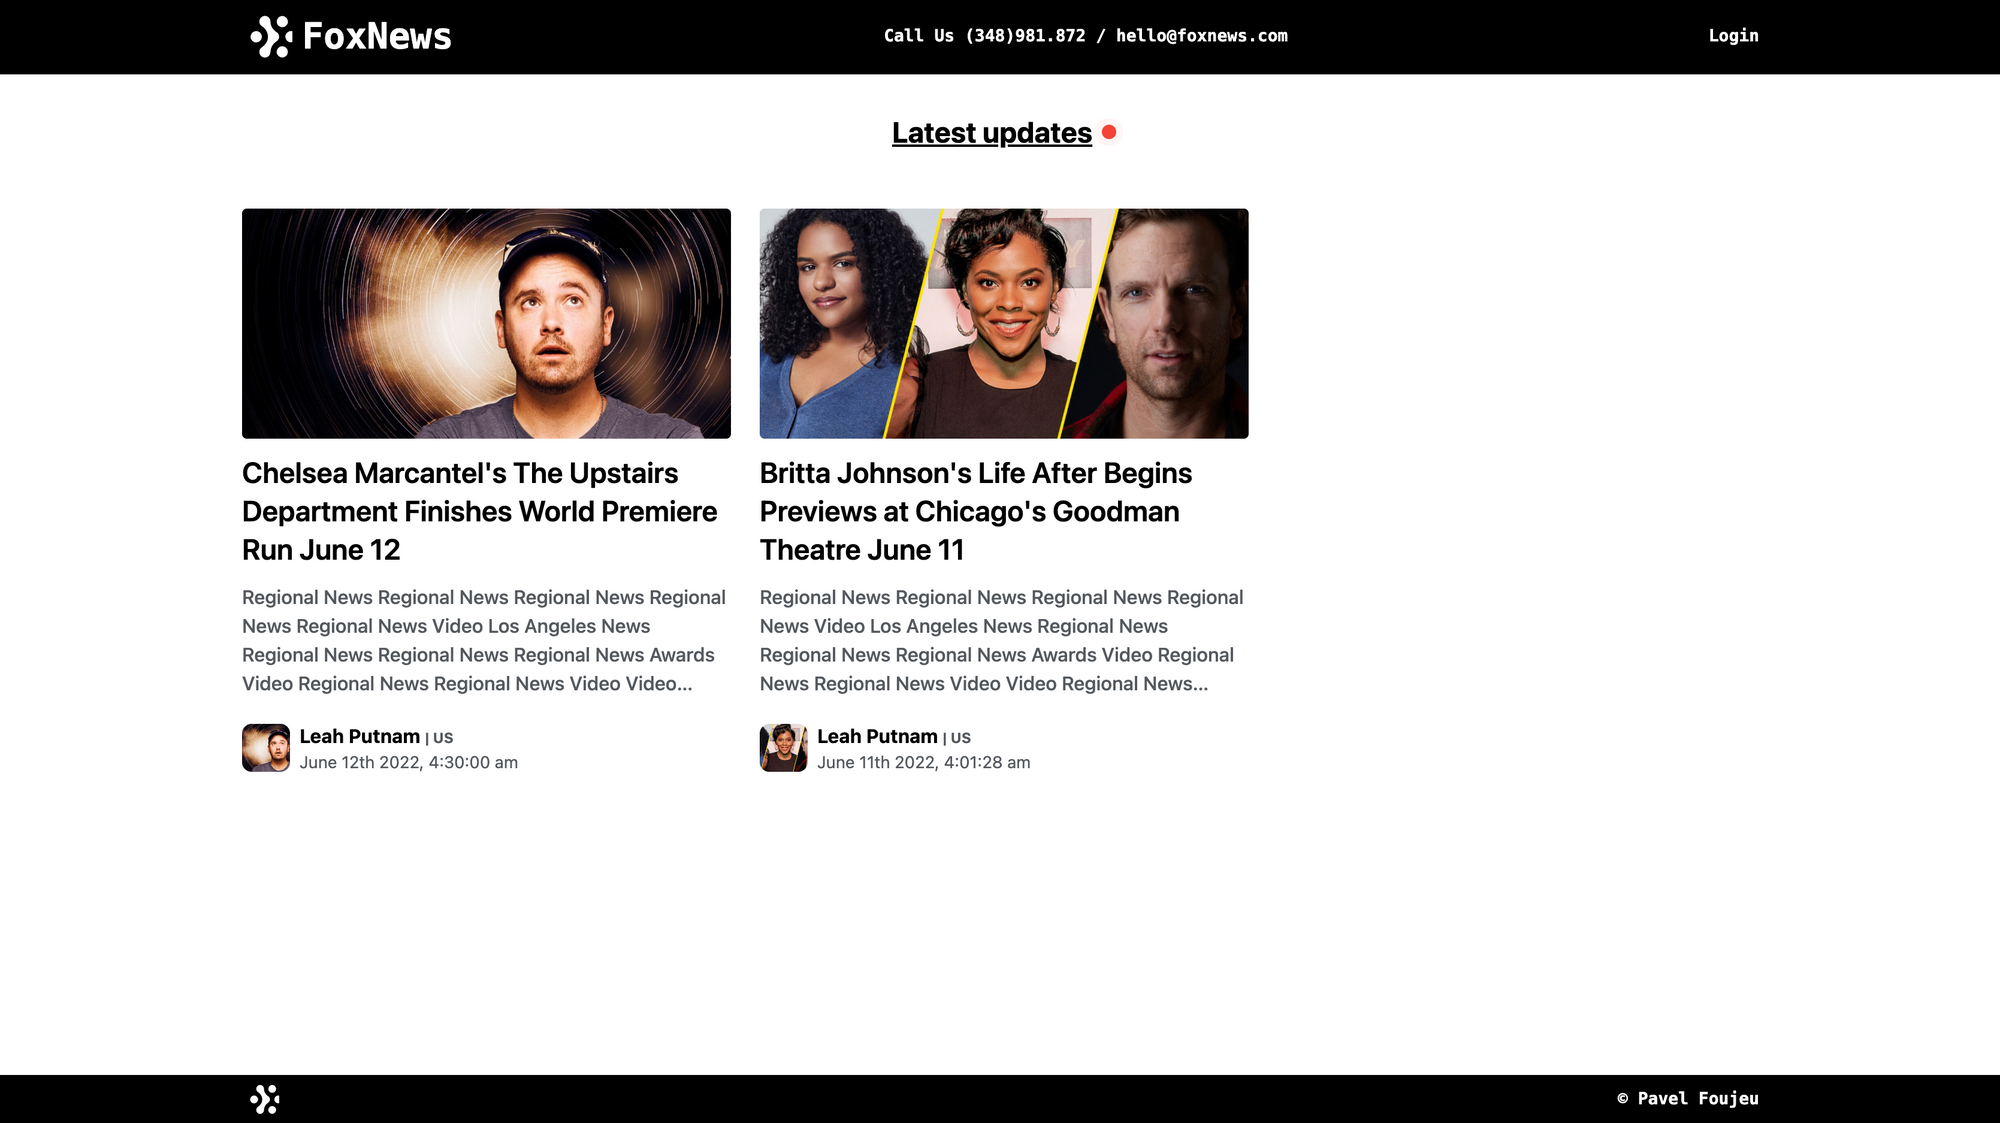
The result look like this
5. The detail page
Next.js has a file-system based router built on the concept of pages with two essentials things to know about Routing.
- Each file inside pages directory is associated with a route based on its file name. This means, if you create
pages/about.tsxthat exports a React component like below, and it will be accessible at/about - Dynamic routes : if you create a file called
pages/posts/[id].js, then it will be accessible atposts/1,posts/2, etc. - To learn more about dynamic routing, check the Dynamic Routing documentation
So, When a file is added to the pages directory, it's automatically available as a route.
The files inside the pages directory can be used to define most common patterns.
Index routes
The router will automatically route files named index to the root of the directory.
pages/index.js→/pages/blog/index.js→/blog
Nested routes
The router supports nested files. If you create a nested folder structure, files will automatically be routed in the same way still.
pages/blog/first-post.js→/blog/first-postpages/dashboard/settings/username.js→/dashboard/settings/username
Dynamic route segments
To match a dynamic segment, you can use the bracket syntax. This allows you to match named parameters.
pages/blog/[slug].js→/blog/:slug(/blog/hello-world)pages/[username]/settings.js→/:username/settings(/foo/settings)pages/post/[...all].js→/post/*(/post/2020/id/title)
Check out the Dynamic Routes documentation to learn more about how they work.
So Let's create the detail page. In src/pages create a new folder named news and add a file named [id].tsx and add the following.
import Image from 'next/image'
import { useRouter } from 'next/router'
import { fakeNews } from '../utils'
import Header from '../../ui/components/Header'
import Nav from '../../ui/components/Nav'
import News from '../../ui/components/NewsItem'
import Link from 'next/link'

const articles: NewsAPIObject[] = fakeNews // we will update later

interface IQueryParam {
  id: string
}
const NewsItem = () => {
  const router = useRouter()
  const { id } = router.query as unknown as IQueryParam

  const item = articles?.find(article => article._id === id)

  return (
    <div className="flex flex-col">
      <Header />
      <Nav />
      <div className="sm:mx-auto md:w-11/12 sm:w-11/12 mt-32 lg:w-6/12">
        <Link href="/" title="Back to Home">
          <Image src="/back.svg" alt="Logo" width="39" height="32" className="cursor-pointer" />
        </Link>
        {item && (
          <News
            media={item.media}
            title={item.title}
            summary={item.summary}
            author={item.author}
            authorImg={item.authorImg}
            country={item.country}
            _id={item._id}
            published_date={item.published_date}
            expand={true}
          />
        )}
      </div>
    </div>
  )
}

export default NewsItem
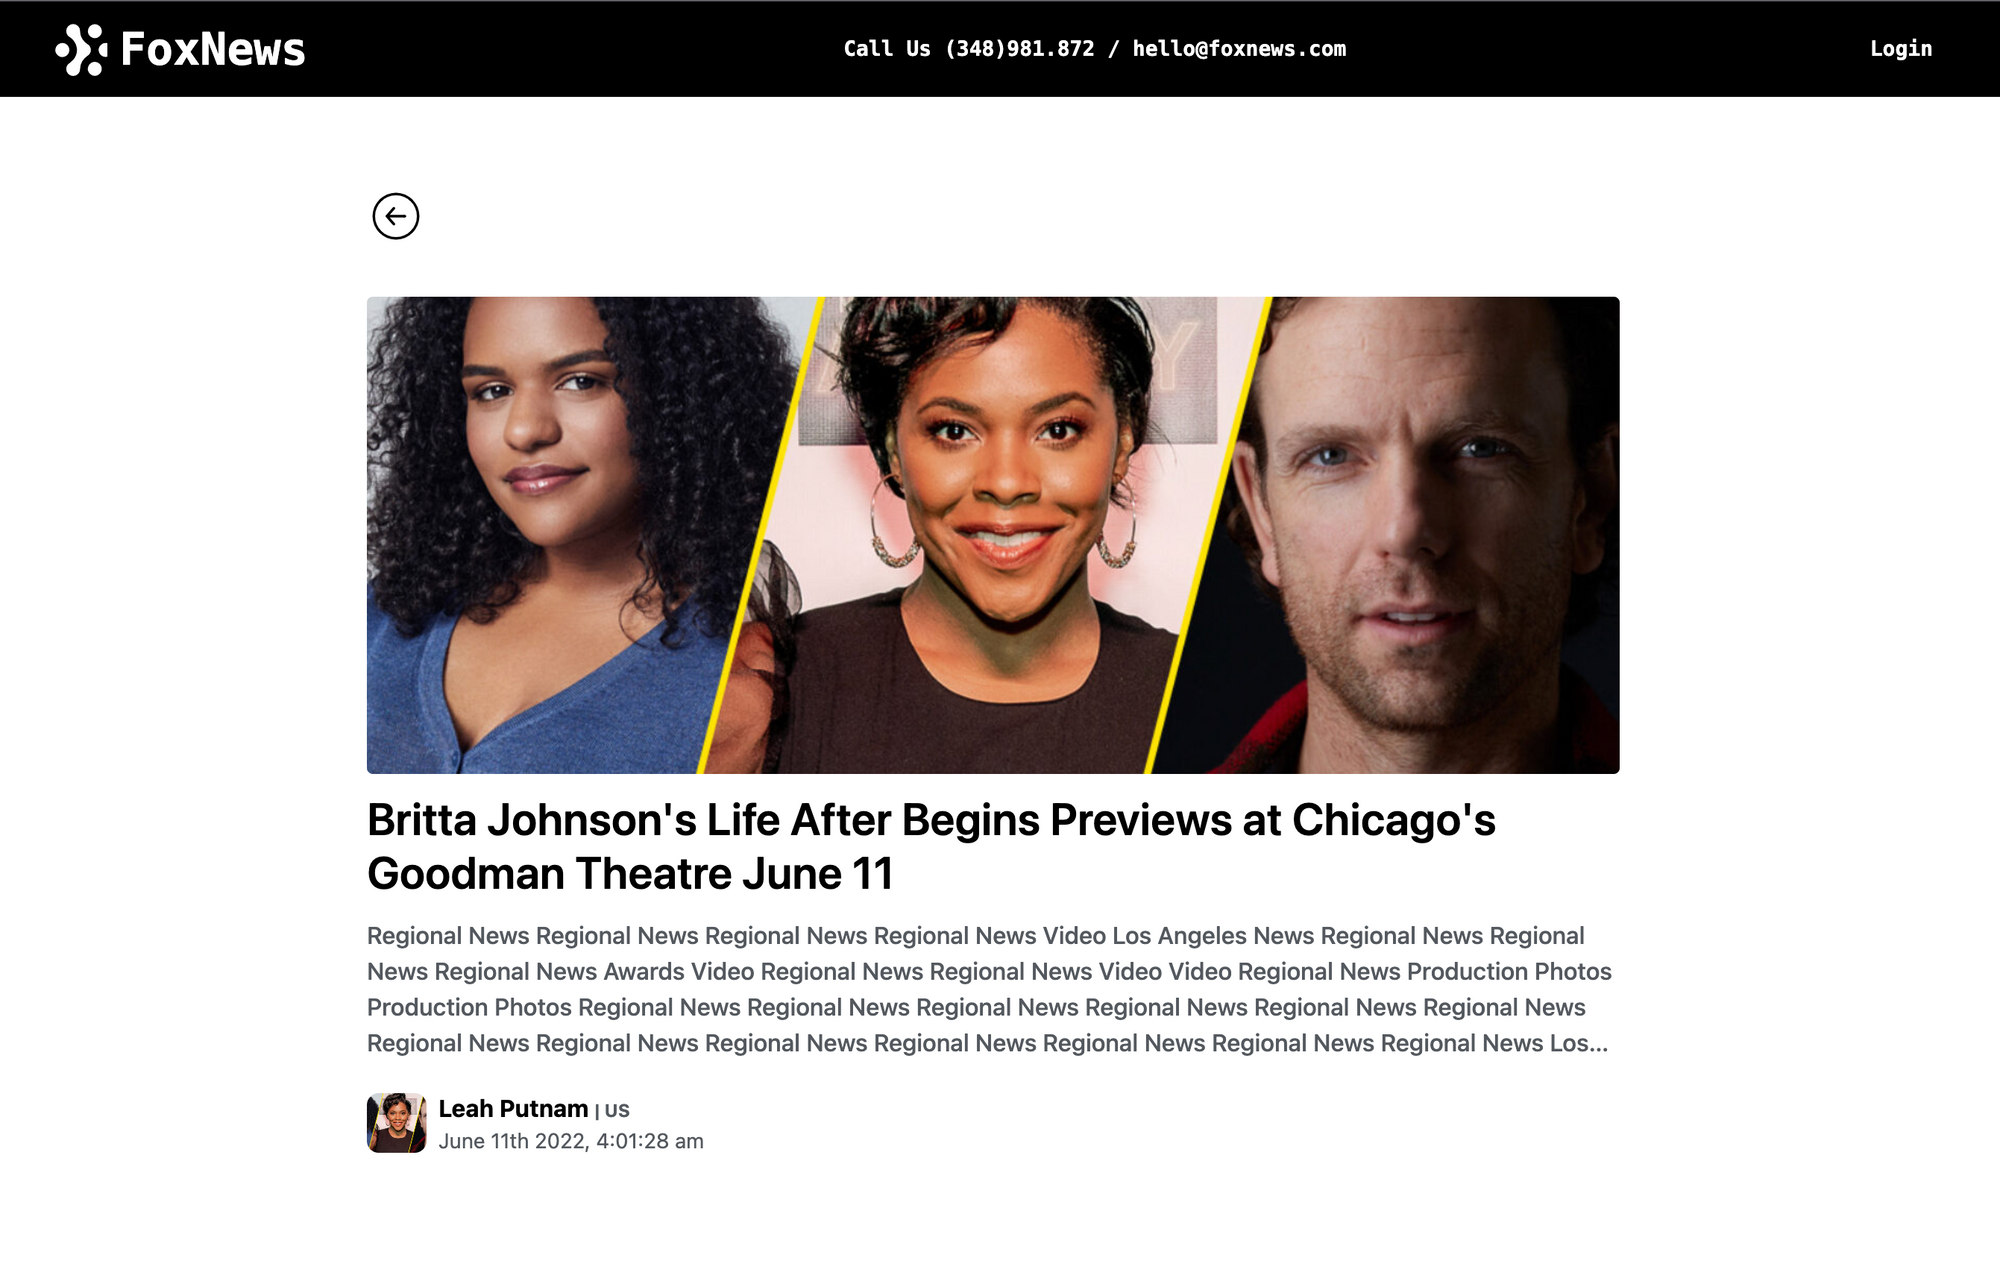
That's all. if we click on one item on the main page, it will display the follow result
Now lets add some pagination Item at the bottom to navigate over Previous and Next News
Inside src/ui/components create two components
- PaginationItem.tsx
import moment from 'moment'
import Link from 'next/link'

interface PaginationItemProps {
  position: 'right' | 'left'
  title?: string
  mediaSource?: string
  date?: string
  id?: string
}
const PaginationItem = ({ position, title, mediaSource, date, id }: PaginationItemProps) => {
  const image = mediaSource as string
  return position == 'left' ? (
    <Link href={`/news/${id}`}>
      <div className="flex max-w-sm cursor-pointer transition hover:scale-105 duration-300 ease-in-out delay-50 w-full">
        {image && <img className="rounded w-16 h-16" src={image} alt="Img" />}
        <div className="flex flex-col ml-2 max-w-xs hover:underline justify-items-start ">
          <strong className="line-clamp-3 text-ellipsis overflow-hidden">{title}</strong>
          <span className="text-sm text-description">{moment(date).format('MMMM Do YYYY, h:mm:ss a')}</span>
        </div>
      </div>
    </Link>
  ) : (
    <Link href={`/news/${id}`}>
      <div className="flex mt-10 md:mt-0 cursor-pointer w-full transition hover:scale-105 duration-300 ease-in-out delay-50 ">
        <div className="flex flex-col  mr-2 max-w-xs hover:underline text-right ">
          <strong className="line-clamp-3">{title}</strong>
          <span className="text-sm ">{moment(date).format('MMMM Do YYYY, h:mm:ss a')}</span>
        </div>
        {image && <img className="rounded pl-22 w-16 h-16 " src={image} alt="Img" />}
      </div>
    </Link>
  )
}

export default PaginationItem
- PaginationBottom.tsx
import { NewsAPIObject } from '../../utils'
import PaginationItem from './PaginationItem'

interface IPaginationBottomProps {
  leftItem?: NewsAPIObject
  rightItem?: NewsAPIObject
}
const PaginationBottom = ({ leftItem, rightItem }: IPaginationBottomProps) => {
  const {
    title: leftItemTitle,
    media: leftItemMediaSource,
    published_date: leftItemDate,
    _id: leftItemId
  } = leftItem as NewsAPIObject
  const {
    title: rightItemTitle,
    media: rightItemMediaSource,
    published_date: rightItemDate,
    _id: rightItemId
  } = rightItem as NewsAPIObject

  return (
    <div className="mt-10 mb-20 md:flex flex-row justify-between w-full">
      <PaginationItem
        position="left"
        title={leftItemTitle}
        mediaSource={leftItemMediaSource}
        date={leftItemDate}
        id={leftItemId}
      />
      <PaginationItem
        position="right"
        title={rightItemTitle}
        mediaSource={rightItemMediaSource}
        date={rightItemDate}
        id={rightItemId}
      />
    </div>
  )
}

export default PaginationBottom
Update the detail page [id].tsx file inside src/news folder
import PaginationBottom from '../../ui/components/PaginationBottom'

const NewsItem = () => {
..
const item = articles?.find(article => article._id === id)
  const itemIndex = articles?.findIndex(article => article._id === id)
  const leftItem = itemIndex === 0 ? item : articles[itemIndex - 1]
  const rightItem = itemIndex == articles.length - 1 ? item : articles[itemIndex + 1]

   return (
   <div className="sm:mx-auto md:w-11/12 sm:w-11/12 mt-32 lg:w-6/12">
   ..
   <PaginationBottom leftItem={leftItem} rightItem={rightItem} /> // <= THIS LINE
   </div>
   )

}
export default NewsItem
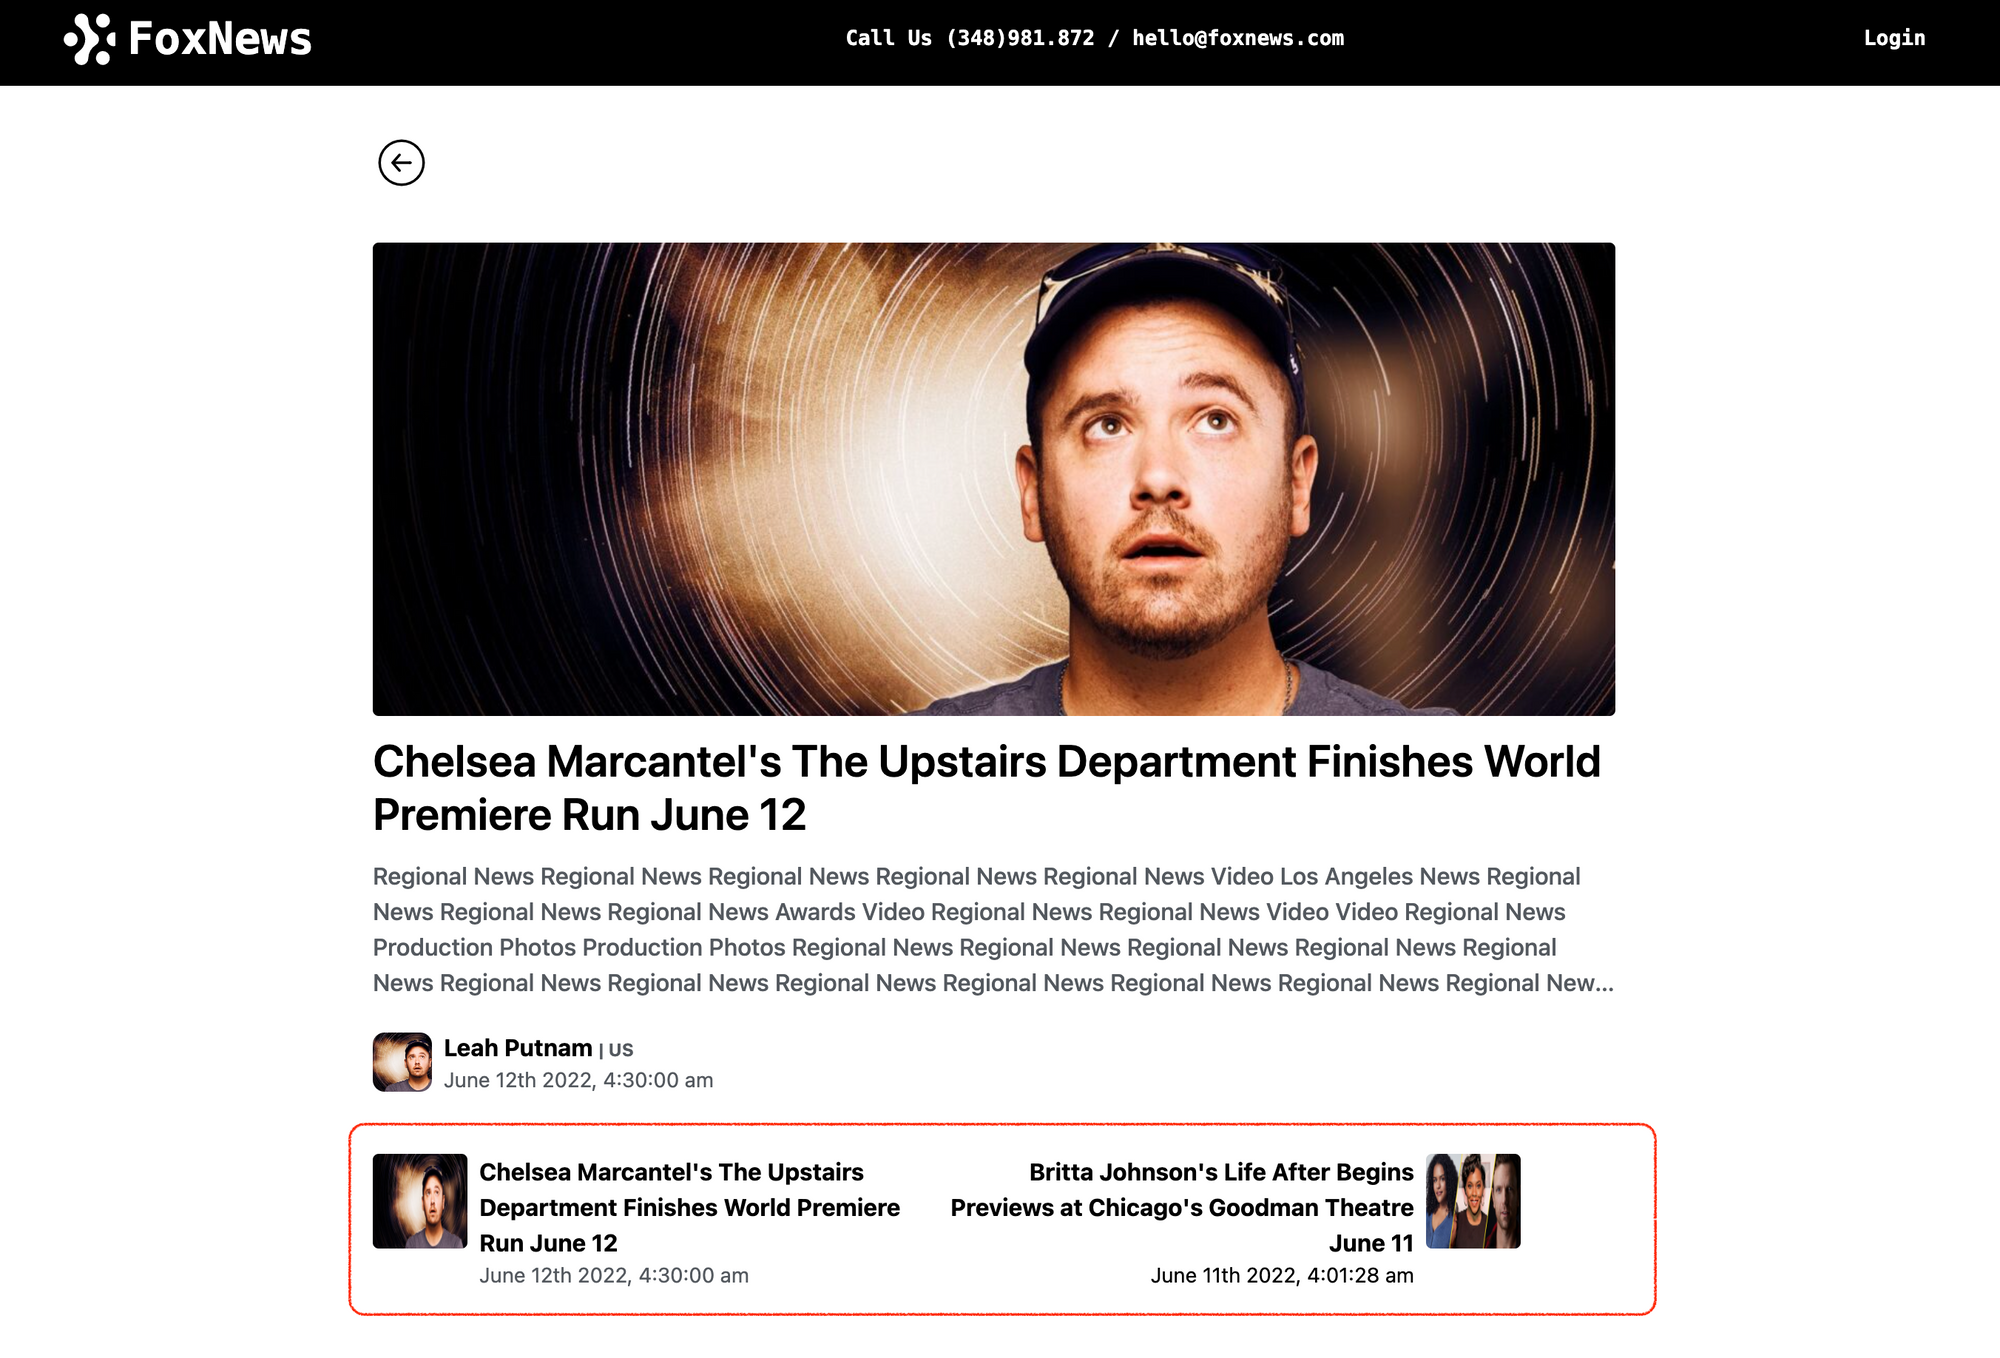
And this produce the following result
We have completed this Second Part of the tutorial. In the next tutorial, we will see how to setup Redux with Redux toolkit.
Thanks for reading.
Follow me on socials media to stay up to date with latest posts.


